

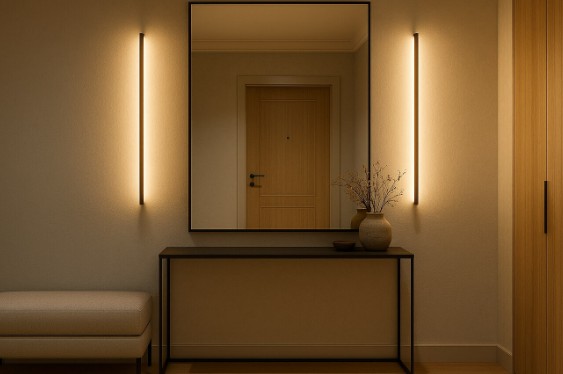
A hallway light can look slim in a photograph and still project farther into the room than expected. That extra depth becomes noticeable when you carry a laundry basket past it, open a cupboard door or squeeze around the coats hanging by the entrance.
Choosing a fitting for a narrow hallway starts with those ordinary movements. The wall may have enough space for the light, while the passage beside it needs closer consideration. Before settling on a style, look at the hallway with its doors, storage and everyday belongings in use.
Walk through with the things you normally carry
Leave the shoe cabinet, console and coat hooks as you usually use them. Hang up the bulky jackets, put the bags down and open the cupboard doors. You will get a more useful picture than you would from an empty hallway.
Walk from the entrance towards the adjoining rooms carrying something familiar, such as a shopping bag or laundry basket. Notice where you turn sideways, reach for a handle or step around furniture. Mark those locations on a simple sketch before considering a light for the wall beside them.
Include doors that open into the hallway. Their movement can take up space well beyond the doorframe, and a handle may reach a different part of the wall from the door itself. Hold a paper outline in place while opening the door to see where the two would overlap.
Consider a wall light alongside the console, mirror, doorways and other features that share its position.
Read the depth measurement carefully
When comparing wall sconces, record the projection from the finished wall alongside the height and width. Check that the stated measurement includes the complete fitting, including its backplate, arms and shade.
A front-facing photograph can leave the projection unclear. Ask for a side view or dimension drawing if the product page does not show it. A narrow shade on a long arm can occupy considerable space, while a wider fitting may sit closer to the wall.
Use the side view and dimension drawing to check the complete projection from the wall.
Make a paper outline to judge the fitting’s face against the wall. Note the depth on your sketch so you can judge the space left beside consoles and other furniture. A flat outline alone cannot show how far the light will extend into the space.
The mounting position should suit the fitting, the people using the hallway and the installation requirements. A height recommendation from a room photograph gives you very little information about your own doors, furniture and available clearance.
Decide where the light needs to fall
Follow the route after dark with the existing lights switched on. Look at the entrance lock, the place you put your keys, the shoe storage and any bend in the passage. Note the specific areas that remain difficult to see.
A decorative glow up the wall may look attractive while leaving the key tray in shadow. A shade that directs most of its light downwards will create a different effect. Compare the intended light direction and coverage with the task you identified.
Ask for lighting information for the exact model and size under consideration. Styled product photographs can help you understand the appearance, but they cannot establish how many fittings your hallway needs. The wall color, layout and other light sources all belong in that discussion.
Check the wall around the fitting
Door trim, switches, picture frames and panelling can leave surprisingly little usable wall. Measure the whole backplate and any parts extending beyond it. Check how the outline sits beside these details before finalizing the mounting point.
With patterned wallpaper, place the paper outline against the actual pattern. See whether the fitting interrupts a favorite detail or makes the surrounding area look crowded. For a panelled wall, include the molding in the installer’s assessment of the mounting surface.
Consider what the light will reveal, too. Light directed across a surface can make its texture more noticeable. If the wall has a pronounced finish or visible repairs, discuss the effect you want and look for a comparable lighting example before choosing a fitting that washes that surface.
Plan the controls before the decoration is finished
Walk the route from both ends and decide where you expect to operate the lights. A useful arrangement at the front door may feel awkward when entering from a bedroom. Explain those routines to the installer when discussing the available control options.
Confirm the power supply, dimming method and any separate controls for the selected fitting. If wiring or fixed mounting points need changing, have that work assessed before repainting or wallpapering. Include making good the wall in the scope of the work.
Finally, think about reaching the light for cleaning and changing replaceable bulbs. Keep the product dimensions, care instructions and agreed positions together. Once installed, try the ordinary hallway routine again: hang up a coat, put down the keys, open the cupboard and carry a basket through. Each movement should still have the space it needs.

