

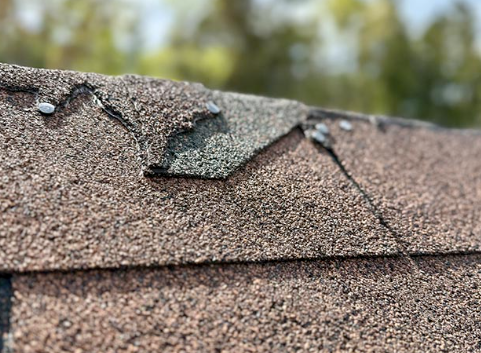
Gettysburg’s freeze-thaw swings, summer downpours, and wind gusts are hard on roofs. That combination exposes shortcuts that might go unnoticed in milder climates. Small misses at the eaves, around a chimney, or in an attic can turn into a ceiling stain or a soft spot in the sheathing. This article covers five roofing missteps that often cause trouble in South Central Pennsylvania and explains what to do instead. You will learn where membranes belong, how step flashing actually works, why balanced attic ventilation matters, what keeps shingles anchored at the edges, and why certain quick fixes rarely last through a season.
1.Ignoring Ice Dam Defenses Along Eaves and Valleys
Ice dams happen when heat from the house melts snow on the roof, then the runoff refreezes at the cold eaves and pushes water up under shingles. A self-adhering ice and water membrane under the starter course and at valleys is the first line of defense. In cold regions, that membrane should extend from the eaves to at least past the interior warm wall line, creating a watertight seal around nail penetrations where meltwater often creeps. Open or closed cut valleys also need reinforcement: use a continuous membrane under the valley and, when using metal valley flashing, follow the manufacturer’s required laps and sealant placement so water cannot track under the metal.
On a January thaw followed by an overnight freeze, homeowners often find water marks near exterior walls. The usual culprit is missing membrane at the eaves or a short run that stops before the warm wall line. Local resources such as Gettysburg roofing from Bealing Roofing & Exteriors explain how eave protection, starter strip adhesion, and properly pitched gutters work together to keep meltwater out of the fascia and off the sheathing.
2.Reusing or Skipping Step Flashing at Chimneys and Walls
Step flashing is not optional trim; it is a course-by-course system that shinglers weave into the roof along every sidewall and chimney cheek. Each shingle course gets its own L-shaped step flashing, and the wall receives counterflashing cut into a mortar joint or kerf, then lapped over the steps. Reusing old, corroded step flashing or installing one long piece of continuous L flashing creates a leak path because water can ride along the metal and find the first gap. Caulk is not a substitute. Proper assemblies include kickout flashing at the bottom to divert water into the gutter and a cricket on wide chimneys to split runoff.
Picture a summer thunderstorm driving rain against the gable end. Without kickout flashing where the roof meets the siding, water can run behind the cladding and soak the sheathing. Inside, that shows up as a diagonal stain or peeling paint at a second-floor corner. The fix is simple but exacting: remove a few siding boards, add a correctly formed kickout, and rebuild the step and counterflashing, tying it into the shingles without exposed fasteners along the vertical leg.
3.Blocking Soffit Intake and Over-venting the Ridge
Attic ventilation works as a system. Ridge vents only exhaust what the soffits can supply. Adding a long ridge vent without a clear intake path starves the system and can pull conditioned air from the living space through ceiling penetrations. In winter, that humid air condenses on the underside of cold roof decking, frosting nail tips and eventually warping sheathing. Before installing or extending a ridge vent, verify that soffit vents are present and open, then install baffles or air chutes above the top plate so blown-in insulation does not choke the intake. In homes with limited eave depth or ornate historic cornices, consider low-profile edge vents or carefully placed box vents instead of cutting a long slot in a roof that can’t supply intake air. The tradeoff is visual uniformity versus balanced airflow that prevents ice dams and premature shingle aging.
4.Edge Details and Fasteners That Decide Whether Shingles Stay Put
Wind uplift failures usually start at the edges. A proper starter course with factory sealant at both the eaves and the rakes locks down the first row and prevents wind from getting under a tab. Drip edge metal matters too: install it under the underlayment at the rakes and over the underlayment at the eaves so runoff sheds cleanly into the gutters. Nail placement is just as critical. High nailing above the shingle’s reinforced nail line reduces pullout strength and can void a manufacturer’s wind rating. In areas prone to gusts, a six-nail pattern on architectural shingles increases resistance compared with four nails. Valleys carry heavy water flow; open metal valleys shed debris better but are more visible, while closed cut valleys hide the metal yet can trap grit if the cut edge is rough. Choose with both performance and maintenance in mind.
Relying on Patches and Aging Accessories
Some of the most frequent leaks come from accessories, not shingles. Pipe boots with neoprene collars crack from UV exposure and seasonal movement, letting water run down the vent stack into a bathroom ceiling. Skylight gaskets and curb flashing kits also age, especially on south-facing slopes. Smearing roof cement around these points may buy a few weeks, but it seldom survives a hot July or a hard freeze. Replacing the boot, adding a storm collar on metal stacks, or installing the correct skylight kit matched to the roof pitch offers durable protection. While you are up there, check ridge caps for exposed fasteners, inspect satellite dish mounts for failed seals, and confirm that metal fastener heads at drip edges aren’t backing out and snagging leaf debris.
A simple seasonal routine helps prevent surprises. After leaf drop, clean gutters and check downspouts for an unusual amount of shingle granules. In midwinter, after a deep freeze, peek in the attic with a flashlight for damp sheathing, frost near the ridge, or dark streaks at valleys and chimneys. Before large projects like exterior painting, repointing a chimney, or installing solar, coordinate roof work so you flash penetrations once, correctly, instead of patching them repeatedly. Small, precise steps at eaves, edges, and penetrations do more to keep water out than any cosmetic fix.
Gettysburg’s weather exposes the weak links in a roof: missing ice and water membrane at the eaves, reused step flashing, choked soffits, and high nailing near the shingle exposure line. Addressing those specific details prevents the most common leaks. Walk your property after major storms, zoom in on edges, valleys, and accessories, and check the attic when temperatures swing. Keep notes and photos, especially around chimneys and bath vents, so you can spot changes easily. When something looks uncertain, ask a local roofing professional to evaluate the assemblies you cannot safely access. A roof that is detailed correctly at a few critical points will ride out snowmelt, summer squalls, and gusty fronts with far fewer surprises.

